I’m starting a new type of blog post. I have a long list of wavy hair techniques or styling methods that I’ve wanted to cover in a blog post in some way or another. I didn’t feel like making a whole blog post per method really made sense, though. I’ve decided to just do blog posts that cover three or so methods per post. This way I can cover all the techniques that I want to cover without making a ton of small blog posts.
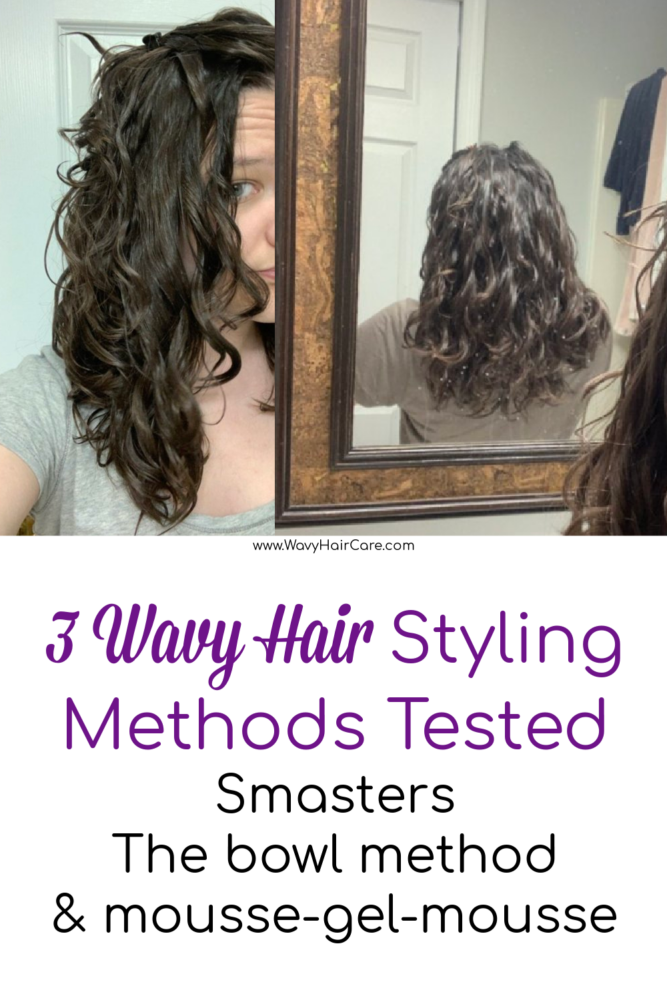
The Bowl Method
I first heard about the bowl method a couple of years ago on Instagram, but @Curlyzia.xo has gone viral with her bowl method tiktoks so a lot of people will recognize it from there. I’ll embed one of her tiktoks here for those who haven’t seen it, it’s easier to grasp when you see it in video form I think.
@curlyzia.xo Still get messages daily of people saying how much this helped. Makes me smile so much 😍🙌🏼 #ziasbowlmethod #bowlmethod #curlclumps ♬ Home – Edith Whiskers
The bowl method is a technique that lets you re-wet and re-use water on your hair while styling. You use a large bowl with some fresh water in it to soak your hair after your shower. Then you apply your styling products over the bowl, and if you do any scrunching you let that water that squeezes out fall into the bowl.
For example, you may apply a leave-in conditioner over the bowl and then scrunch your hair over the bowl. Some of your leave-in conditioner will leave your hair but it will fall into the bowl. Then when you soak your hair in the bowl again, you can regain some of that leave-in conditioner. Basically, it’s a way of wasting less product and/or keeping more hair products in your hair despite adding water, as well.
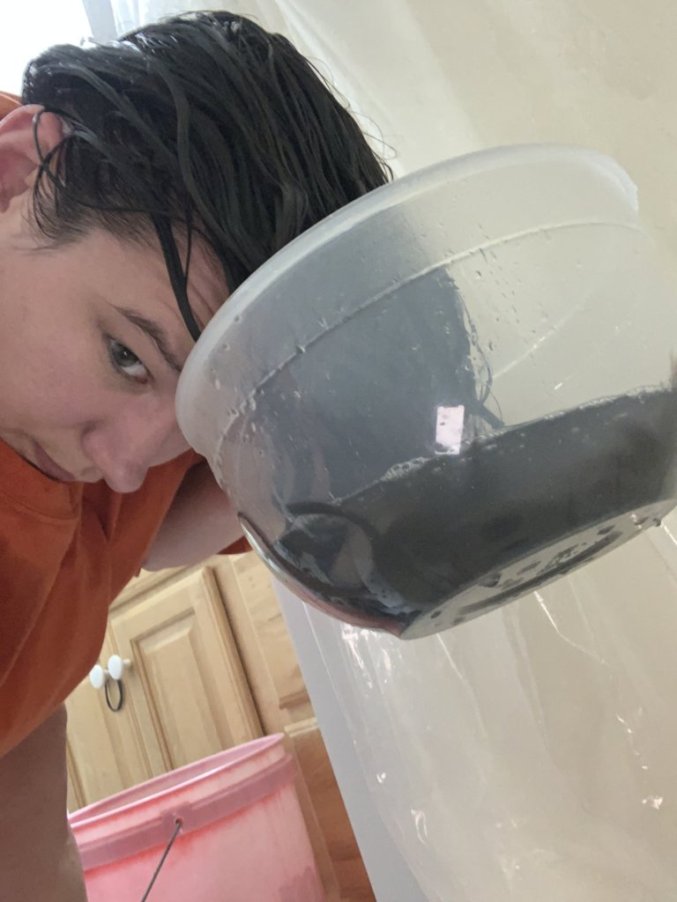
The bowl method is VERY hydrating, so some may do it if they feel their hair is really in need of intense hydration. Others use it because it creates really big curl clumps and they prefer that look.
I typically style my hair by plopping for 10 minutes and then applying gel or mousse, and diffusing…so I usually use pretty minimal water in my styling routine. When testing the bowl method, I used the bowl method when applying gel after my shower, then I plopped for 10 minutes, and then I diffused. I plopped to try to reduce my diffusing time some vs going straight into diffusing.
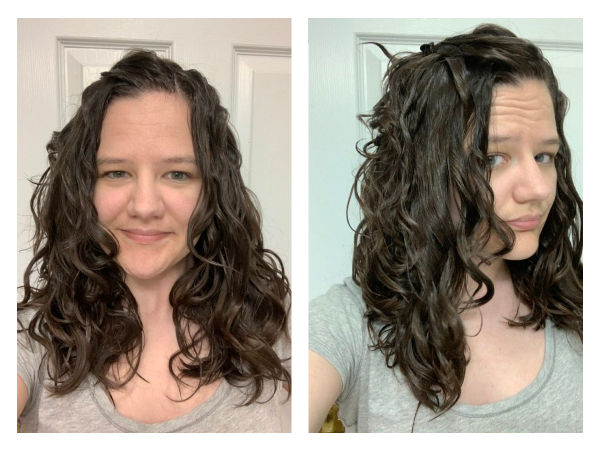
I found that using the bowl method got me bigger curl clumps. I didn’t get as hard of a cast as I usually get from the gel that I used. I actually added more gel after my hair was partially diffused because realized it was way too soft. I suspect that having more water in my hair had an impact on the stiffness of my gel.
I was happy enough with how my hair looked when using the bowl method, but I think this was likely due to adding more gel part way through. Even with this, my curl pattern was a bit stretched out or weighed down than usual, I think due to the added weight of the water in my hair pulling it straighter.
To use this method and get enough hold without adding more in the middle, I think I’d have to use a LOT more gel than I usually use…and I usually use a lot! So, a big downside of this method in my opinion is how I’d have to use a ton of gel. That seems a bit wasteful.
Some say you can use this method to minimize frizz. It’s suggested to keep dipping your hair into the bowl until you get frizz-free clumps. I don’t usually have much wet frizz, but I always have some. I didn’t find that I could completely get rid of my wet frizz by duking my hair in the bowl. I think this might be better suited to hair types that really crave hydration. That just isn’t my hair type.
Manes By Mell has a video on this and said she believes this method can damage hair if used regularly over a long period of time. Basically, it may be giving our hair more water than it needs.
Smasters Technique
Smasters is a technique that involves applying gel, letting your hair dry about halfway, then adding more gel. The term comes from a username on the NaturallyCurly forums, someone with Smasters in her username created this method.
Some people use Smasters on purpose each wash day, because they feel that it gives them extra definition for their waves or curls. I don’t usually intentionally do this, but I find it to be an awesome way to “save” a wash day where you accidentally didn’t add enough product or didn’t get your products well distributed.
If I am part way through diffusing and notice that most of my hair has formed a cast, but part of my hair is too soft, I will pause and add more gel to that section before I continue with diffusing further. I had intended to do this technique separately from the other techniques, for the sake of showing the results in this photo. However, I did the bowl method and ended up needing to use smasters! So the photos from the bowl method also show smasters as I used both techniques.
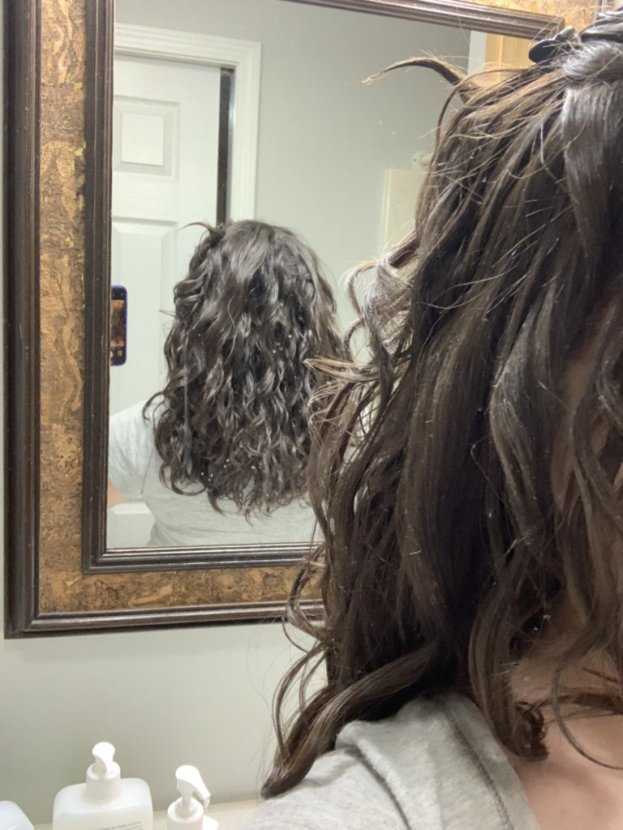
The goal with Smasters is to get as much definition as possible, but in my opinion it’s also great for ensuring hold.
Mousse – Gel – Mousse hair technique
Mousse, gel, mouse is a technique where you layer a mousse, then a gel, then mousse again. The intent of this technique is to get the benefits of mousse and the benefits of gel in a single wash day.
When using this technique, some people use two different mouses, while others will use one mousse two times. I get a little nervous when layering products for the first time, as not all products will work well together. I know that brands try to make their product lines all work well together though, so I opted to use a mousse and a gel from the same product line, and to reuse the mousse. I knew this would ensure I wouldn’t use products that may react poorly to each other.
I used the Aussie Instant Freeze gel and mousse. A lot of people really love the Aussie instant freeze gel, but it’s not a favorite of mine. I have always found it to give me more of a medium-level hold than a hard hold. However, I really like the Aussie instant freeze mousse, and find it to have enough hold for me. So, I thought I could use both.
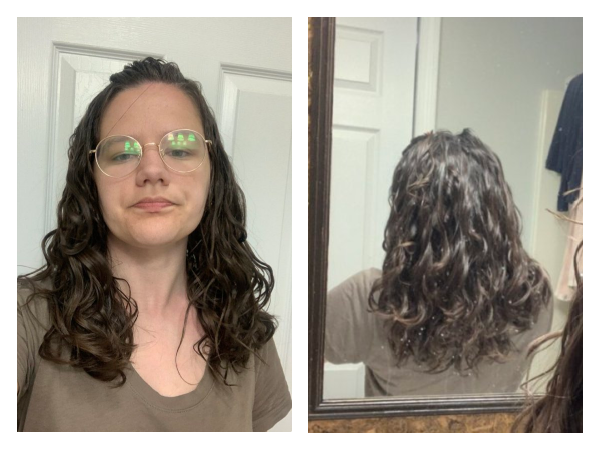
I washed my hair as usual and plopped for 10 minutes, as I usually do. Then I applied mousse to all sections of my hair, but I used less than I usually would. I tried to use about 1/3 of what I would normally use. Next I used the Aussie instant freeze gel, and again used it all over my hair but I tried to use about 1/3 the amount I would normally use. Then I did another round of mousse. At first I tried using about 1/3 of what I would usually use, but I could tell that my hair didn’t have enough product in it, so I used a little more until my hair felt right to me.
I felt like this wash day resulted in more definition than I sometimes get, yet also decent volume at the same time – which was cool. I got a nice cast, more than I’d expect to get when using Aussie Instant Freeze gel by itself. This helped me to recognize that when I have a product that I don’t love using on its own (like this gel) it may still work great when paired with another product.
I read your article and watched the small video about CGM. I have very fine silky low density high porosity 2A with some 2B underneath. I started this journey reading your blogs and watching your videos. I have natural white and silver streaked hair that used to be blonde. I have problems with my hair going flat and losing the main wave pattern. Currently I am using EvolVh InstantVolume shampoo and Instant volume elixir. I have a frizzy spot on the back of my head which is wavier and I mist it with InstantVolume or Instantsmart leave in. Them I have been playing with four different mousses. The EvolVh mousse is thinner than the NYM and the Aussie. I didn’t like the Herbal Essence as it fell flat on my hair. So far I love Curls Blueberry Bliss gel the best. I had my hair cut into a shoulder length Bob and love it for this summer heat! That is my hair by Syd!