“How do you apply your products?” is a question that I’ve received in comments and emails a few times. I’ve wanted to answer this question, but I thought it made sense to share different application techniques rather than making an entire blog post about one method. For the last few weeks I’ve been testing product application methods, so that I could compare them for you all.
How To Apply Products On Wavy Hair (Video)
While I’m sharing them here in written form with photos, I’ve also documented these with video. If you might find it easier to understand these application techniques by seeing me do them, check out my tiktok video or YouTube video that I made showing all six techniques and the results.
For the sake of trying to keep results ‘fair’, each wash day I washed my hair with the same shampoo, conditioner, leave-in conditioner and mousse. I attempted to use the same amount of product, and the same routine and techniques other than how I applied the mousse each time. My goal was to try to make make it so that the only differences in these wash days was the product application technique. I prefer damp styling usually, so I plopped for 10 minutes each time and then added mousse.

How To Scrunch Gel Into Wavy Hair
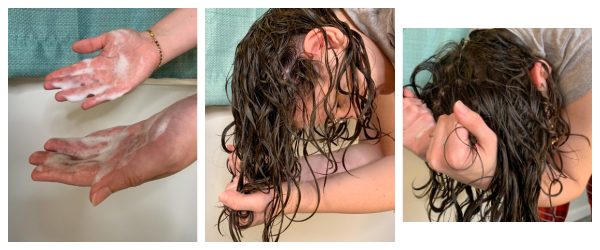
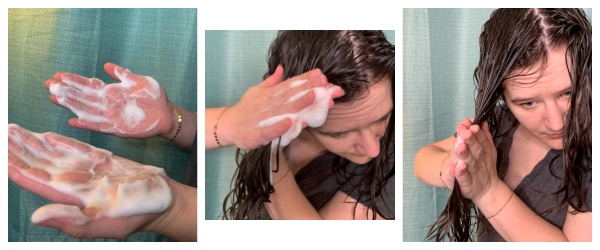
Scrunching is when you place your hands under your hair and raise your hands so tha your hair pools into your palms. Once you reach the top of your hair, you squeeze your hand closed, “scrunching” the hair that is in your palm. This is often done without product as a way of encouraging waves/curls to form. However, it can also be done as a product application technique.
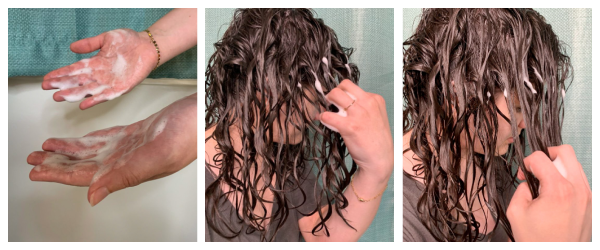
To scrunch gel into your hair, add gel to your palm and then rub your hands together so that the gel is distributed across your whole hand. Place your hands under your hair and raise them so that your hair pools into your hand. Once at the roots of your hair, squeeze your hand to ‘scrunch’ your hair. If you have longer hair, you may do some scrunching at mid-length as well. Add more gel to your hands and scrunch a new section of hair and continue until you’ve covered all of your hair.
Tilting your head to the side that you are applying product to can assist you with getting your hands closer to your roots. For example, if you wan to add product to your front left side, try tilting your head towards your left so that your hair falls away from your scalp a bit. This may make it easier to get your hands all the way up to the roots of your hair in that section.
My experience with scrunching in product
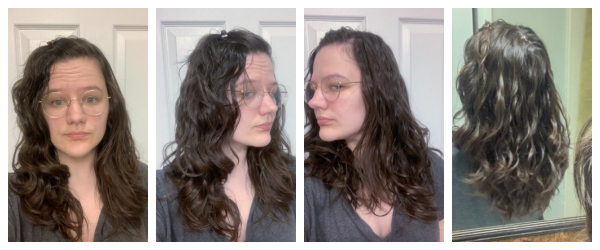
When I was new to the curly girl method, I tried to scrunch my gel in and it didn’t work very well. My hair was really long at the time (almost down to my butt!) and I found that I’d get a gel a the ends of my hair, but not close to my roots. This may have been a result of me not using enough gel, or me not paying enough attention to ensure I was getting my hands all the way up to my roots.
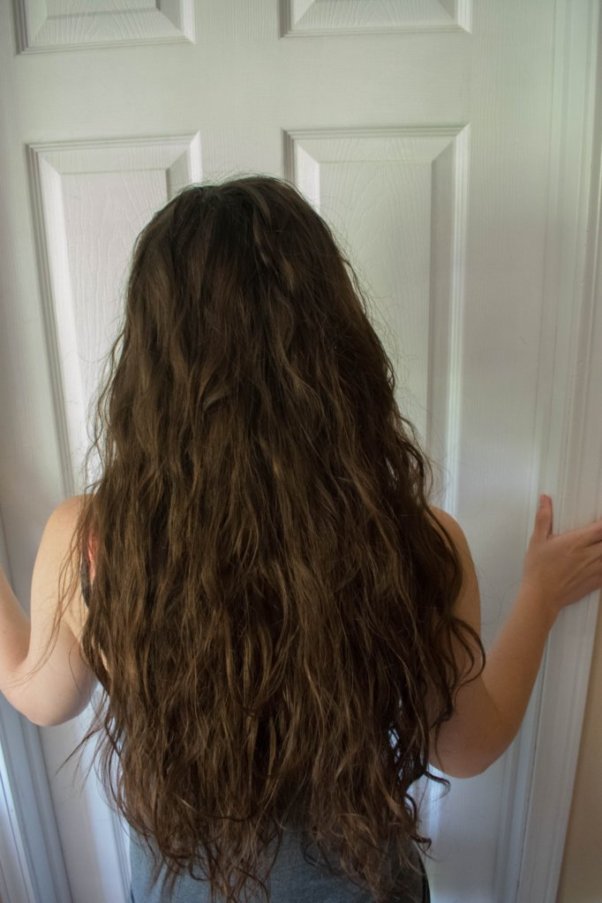
The photo above is an early attempt I made at scrunching in gel. Notice how some areas look stiff and are in curl clumps while others are really soft or frizzy? That’s because I didn’t get gel evenly all over my hair.
Still, I think it’s generally easier to do a combination of methods for eve product distribution rather than exclusively scrunching. However…
I tried to just scrunch in mousse recently, and was pleasantly surprised that I was able to get a cast all the way up my hair. I was just very intentional about making sure I scrunched all the way up to my roots in all places.
The pros and cons of scrunching in products
The pros:
- Great volume
- Mid-sized curl clumps (may get skinny if you have low-density hair, or scrunch really long or really hard)
- Enhances or maximizes curl tightness.
The cons:
- It can be a little tricky to make sure you get your product(s) evenly over all of your hair. In particular, it may result in more product being at the end of your hair than higher up your strands.
- Curl clumps may vary in size.
- May introduce a bit more frizz than some other methods.
How To Rope Hair Products Into Wavy Hair
Roping is a technique that I hadn’t tried out until testing methods for this blog post, so this was a fun one for me to try.
Roping is when you squeeze sections of your hair from root to end, sort of like squeezing a rope. To apply products via raking, you apply your gel (or other product) to your palms and spread it between your hands so that it is coated across your palms and fingers before you squeeze your hair. This way, when you squeeze your hair in the rope-like fashion the gel will be released from your hand into your hair.
My experience with roping product into my wavy hair
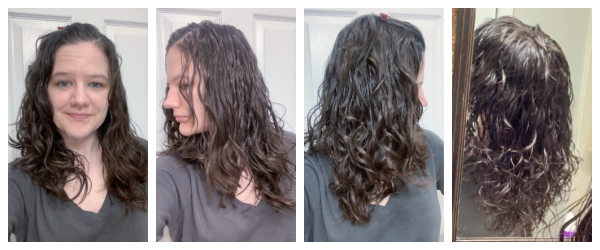
I found that after roping product in, my hair had fallen a lot flatter than it had been before I did the roping technique. So I scrunched my hair a little to help revive my waves before diffusing. All of my remaining techniques use a combination of another technique and then scrunching.

I found that roping products in gave me big curl clumps. Diffusing took me longer on this day than usual, and I suspect that is because the curl clumps were bigger. I really liked my results using these techniques, I felt that I got good volume but also good definition.
The pros and cons of roping in hair products
Pros:
- Big curl clumps
- Good volume and definition
Cons:
- Not real easy to make sure you get your products evenly distributed.
- Took longer to dry as a result of bigger curl clumps
How To Glaze Products Into Wavy Hair
Glazing (followed up by scrunching) has been my go-to hair product application for years now. 99% of the photos on this blog will show you results that I get from glazing and scrunching. Still, I wanted to include this method in my official ‘testing’ for the sake of equal comparison.
To glaze products into your hair apply your product into your palm and rub your hands together to distribute the product across your hands. With your head upside down or tilted, very gently “glaze” your hands over the front and back of your hair in each section.

If you’re familiar with prayer hands (which I’ll include farther down on this post) glazing is basically gentle prayer hands. I have dense hair, so I also like to separate my hair in the center when I am upside down, and glaze in the center as well. This is hard to explain but you can see it in this tikok.
@wavyhaircareblog Once upon a time I thought something was wrong with my hair in the back that was causing it to not cast! 🤣 I just didn’t realize I wasn’t getting enough gel there! #wavyhair #gelcast #wavyhairtutorial #hair ♬ original sound – Emily – wavy hair care blog
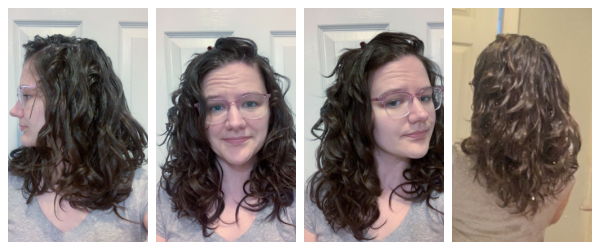
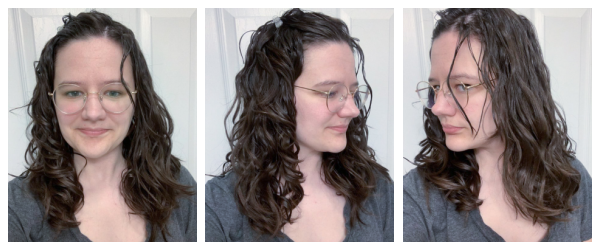
My experience with glazing in hair products
Early on in my journey, I liked glazing and then scrunching because it gave me a more reliable cast, as a result of it being easier to make sure I was getting product over all of my hair rather than just the ends. This seemed to work well enough for me early on which is why I’ve stuck with it. It doesn’t give me a uniform curl clump size, but that has never bothered me personally.
Sorry, I forgot to take my regular left, right, center and back photos for glazing! Thankfully I did take this one picture. However, this is my ‘normal’ technique so you can check most any of my other blog posts to see the results it gives me. Or you can also see all sides in the videos linked under the first subheading in this blog post.
The pros and cons of glazing products into wavy hair
The pros
- Easier to get product over all of your hair (especially high up on your strands) with low risk of it getting on your scalp.
- Doesn’t stretch fine or fragile waves out.
- Gives good volume and curl tightness.
The cons
- May not get good coverage in the back of your head if you just glaze the front and the back, especially if you have dense hair.
- May get a variety of different curl clump sizes.
How To Rake Products Into Wavy Hair
Raking products in is common for tightly curly hair, but I had heard that is isn’t the best fit for wavy hair. So, I had never tried I but I thought I would test it for this blog post.
To rake product into your hair, apply product to your palm, then rub your hands together to distribute the product across your hands. Use your fingers in a “rake” shape and drag your fingers through your hair. Go over all sections distributing product all over.
Raking is basically using your hand like a comb to distribute product.
My experience with raking product into my wavy hair
I expected that this would break up my curl clumps (as it did). I also predicted that it would stretch out my waves at first, but that after scrunching they’d come back. Instead, I only regained some of my waves with scrunching. Particularly on my front left side which is always my straightest section, even though I tried scrunching pretty hard, that section of hair just wouldn’t spring back up the way it usually does.
I also found it a bit of a challenge to know how much product to use. I usually apply product to my hair in 4 sections. With raking, it causes you to make sections of hair that are the size of your hand. I found ha this resulted in about six sections for me. I’m not used to applying product in 6 sections, so I wasn’t sure how much mousse to use each time. However, if this method had worked well enough for me I certainly could have overcome this through experimentation.
I suspect that part of why my hair didn’t spring back up well after I scrunched it was because it had gotten a bit too dry. Perhaps raking product in would work better on wet hair rather than damp. I thought an upside of raking might be drying time. I thought if my clumps were skinnier, maybe my hair would get dry faster. I timed it, and it took me 35 minutes to diffuse which is average if not slightly longer than usual. This seems strange, but I may have used more mousse than usual due to the 1/6 section issue.
The pros and cons of raking product into wavy hair
The pros:
- It helps your curls form (somewhat) even curl clumps.
- It’s easy to get product evenly distributed across all of your hair.
- Gives good definition.
The cons
- May stretch out waves.
- Makes skinny curl clumps.
- Doesn’t give much volume.
How To Comb Products In To Wavy Hair
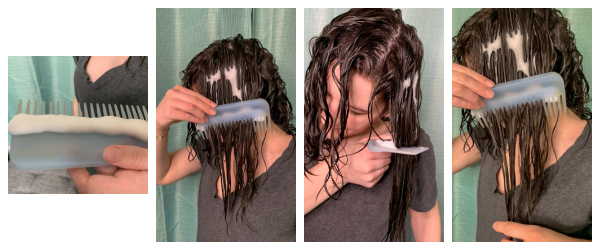
To comb products into wavy hair, apply the products across the teeth of your comb. Then use the comb to comb a section of your hair. Apply more product to the comb each time you cover a new section of your hair. Dense hair may get the best product distribution by combing the underside as well.
I could tell from combing just on top that I wasn’t getting mousse to the underside, so I combed each section of my hair from above and below.
My experience with combing products into wavy hair
I did this after I did raking, so I expected similar results, as combing and raking are similar concepts one just uses your fingers while other uses a comb. The main difference was my comb is rather large so it’s wider than my hands. My comb ca cover about 1/3 of my head at a time, while my hand only covered about 1/6 of my hair at a time. At first I didn’t use much mousse per section but I could feel that it wasn’t enough so I went back in to each section a second time with more mousse. How much product you’ll need to apply will depend on the size of your comb and how much hair it covers.
I found that my results looked similar while we, but were somewhat different after they dried which was interesting. Combing my hair definitely broke up my curl clumps a lot, but after my hair dried one side of my hair (my straighter side) was really flat. The other side got good waves, and they were even in big curl clumps after I scrunched out the crunch.
The pros and cons of combing product into wavy hair
The Pros:
- Helps distribute product evenly
- May help create more even curl clumps? Seemed to do this to me in back, but not in front.
The cons:
- May stretch out more ‘fragile’ hair
- Less volume
How To Use Prayer Hands To Apply Gel On Wavy Hair
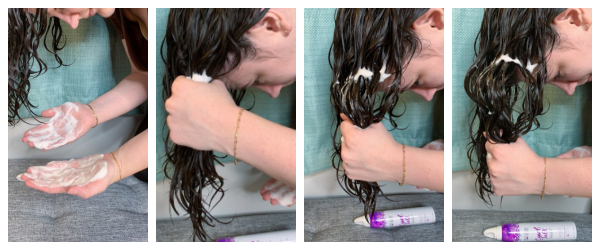
To use prayer hands when applying products to wavy hair, put the product in your palm and then rub your hands together until the product is over both of your hands. Close your hands in the ‘prayer’ position with hair between your hands, and pull your hands from roots to the ends of your hair.
Wavy hair is really similar to glazing, but with prayer hands you close your hands together and apply pressure. This helps push product into the hair, but can also have a flattening effect on fine hair or looser wavy hair.
My experience with using prayer hands to apply products on wavy hair.
I expected the results of this to be similar to glazing, but perhaps with better definition (Due to smashing the product in more) but also with looser results (due to pulling on the hair). My results did seem stretched out as I expected, but I didn’t see any added definition. I know that prayer hands is a good method for people with curlier hair or “stronger” curl patterns but I definitely think glazing works better than prayer hands for my hair type.
Sorry, I forgot to get a photo of the back for this collage! You can check the tiktok or youtube video linked under the first subheading in this post if you’d like to see the back.
The pros and cons of using prayer hands to apply products on wavy hair
The Pros
- Helps distribute product evenly from root to ends.
The Cons
- May stretch out fine hair or wavy hair
- May reduce volume
What is the best way to apply product to wavy hair?
Roping and scrunching gave me big clumps, good volume, good definition ad minimal frizz – so I’d say it’s the best method overall. However, I also get pretty good results from just scrunching, and from raking and scrunching, those two just result in smaller curl clumps.
I have long hair, almost down to my hips. (can’t get it cut yet because I’m broke)(also do you have a lot of layers in your hair?)
have you tried styling your hair at night and going to bed with it wet and then waking up and diffusing?
most the time I shower at night because then I can just get up and go. and I wanted to know if you had and what you thought of it. and any tips for while my hair is longer to help it keep the curl/refreshing it the second day?
Do you have issues with scrunching causing split ends?
and do you know any tips for less tangles?
also if you need an editor I can do that 😄. just trying to survive yo. lol
I keep some layers in my hair but I wouldn’t say a lot. I regularly style my hair at night, but I diffuse it before bed. If I go to bed with it wet, it is still damp in the morning and is a misshapen mess. Sleeping on it wet just isn’t an option for me, so I make time to diffuse before bed. I sometimes sleep in gel cast though. I have some posts about refreshing, and I’d think the information in them would/should apply to really long hair just as well as shorter hair. I don’t have any issues with split ends from scrunching. I’ve read a hair chemistry book and it talks about how split ends are a late stage sign of damaged hair, they usually have bits and pieces of damage throughout the hair strand well before the ends actually split. This is usually only going to happen if you have bleached your hair or used a ton of heat on it. Things like combing, brushing, shampooing, and sun exposure also cause damage in hair but the impact is really minimal as long as you don’t have chemical or heat damage first. Once you bleach your hair, any additional damaging things you do (such as expose it to the sun) do notably more damage than it woudl do to ‘virgin’ hair, because the hair is significantly weakened by bleaching so it then receives far more damage from other smaller forms of damage. But also, longer hair is older hair so with really long hair, it’s always going to have more damage than shorter hair because it has been through more. I have blog posts on tangles. You can find all of my blog posts by visiting my ‘blog post directory’ which is linked in my menu bar. Or the sidebar (or end of my blog if you’re mobile) has a search box that you can use to put in terms to bring up related articles to that term. 🙂